Damage Photos |
Summary
Damage photos can be loaded into your estimates. These photos are saved with your estimate and can optionally be printed on the estimate report.
You need to have the pictures on your computer (or have your digital camera connected to your computer) before you can add them to your estimate. Once the pictures are added to the estimate you don't need to keep them on your computer and will be able to see those pictures from any computer when you look at the estimate.
Detail Instructions
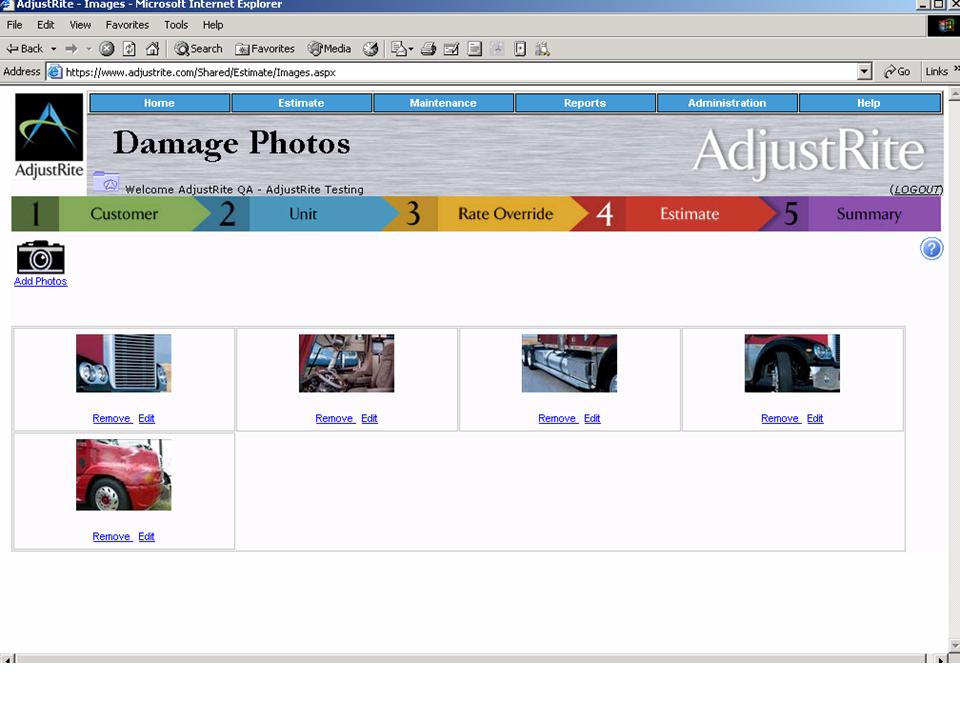
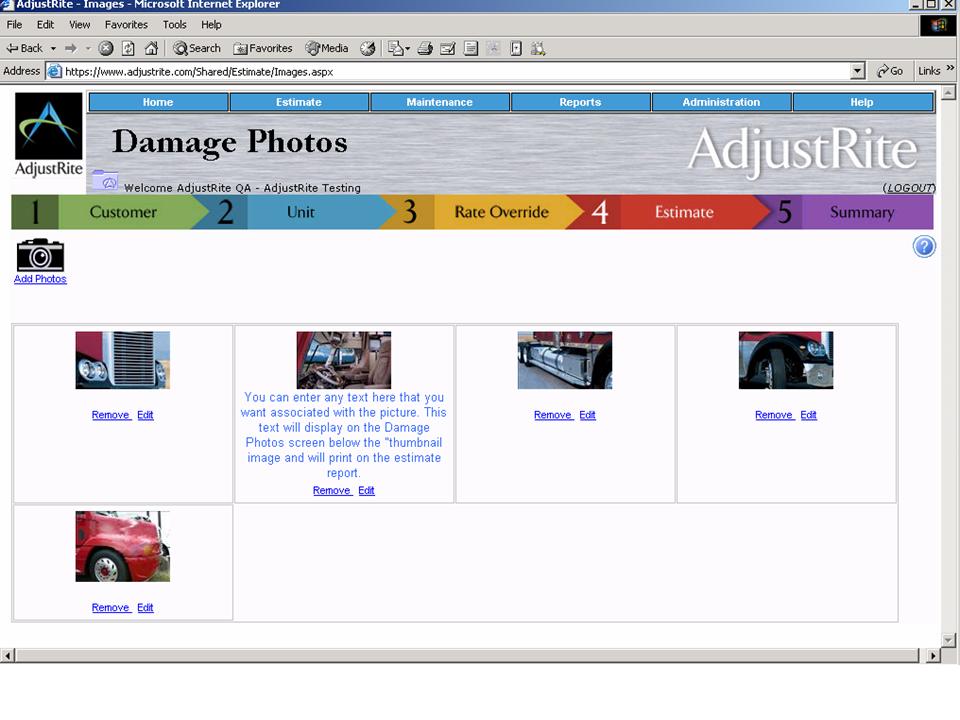
You get to this screen by clicking on the Estimate menu and then selecting Photos to go to the Damage Photos screen.
Click on the
icon or the Add Photos link to add damage photos to your estimate.
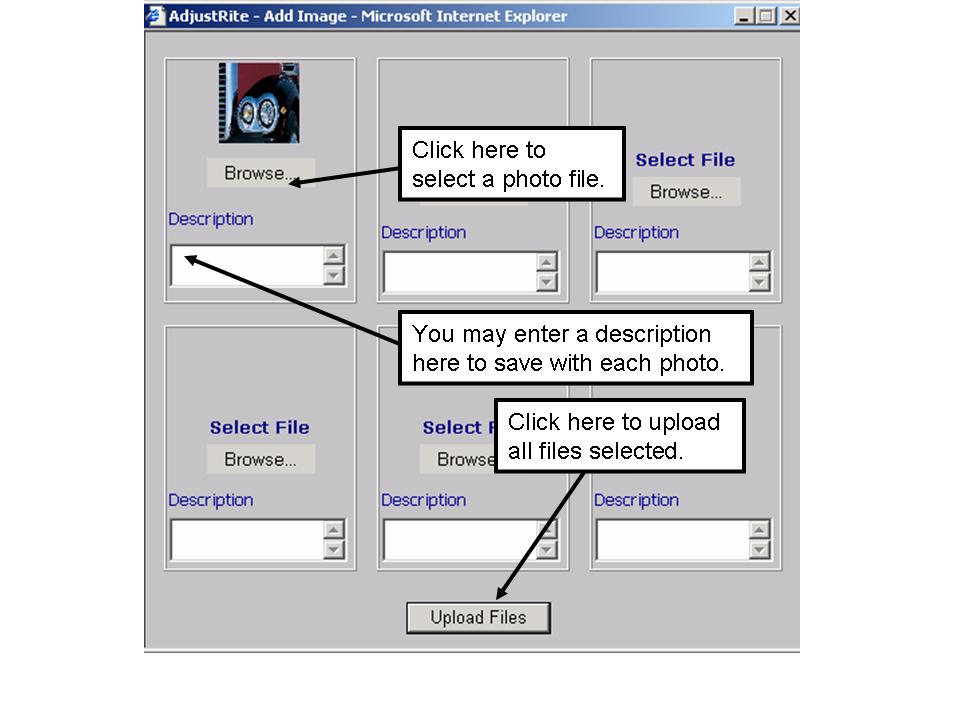
This will popup a window where you can select up to six photos to upload to your estimate. As you select the photos to upload you will see small "thumbnail" images of each photo in this window. When you are sure these are the photos you want just click on the Upload Files button to sent all the photos from your computer to the AdjustRite server, where they will be saved on the server.
Some computers have popup blockers installed which prevent the "Upload Files" button from displaying, even though AdjustRite is set as a Trusted Site in the preferences for Internet Explorer. If the Add Image window does not appear or the "Upload Files" button does not display try setting your system to allow popup's for this site.
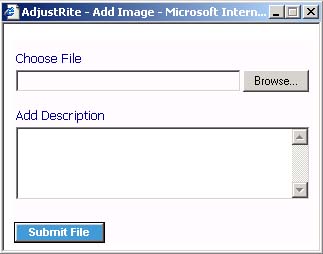
Selecting the "Browse" link on the Add Image window will popup a small window where you you select individual files. This is a standard Windows tool and lets you either enter the full path or browse for your photos. See the detail instructions below.
You may directly type the path and file name in the Choose file box, but it is usually easier to click on the Browse button and search for the file you want to use.
All files should be formatted as jpg files before you add them to an AdjustRite estimate. Fortunately, jpg files are the default file type created by most digital cameras.
AdjustRite will take any size of image and automatically reformat it to be the right size to print on estimates. While any size file can be loaded, your files will upload faster if you resize them to be not more than 400 pixels wide before you upload them.
You may enter a description in the Add Image box before you click on the Submit File button. Don't worry if you forget you enter a description or type something wrong, as you can easily change the description of any damage photo at any time.
After you Upload Files they will be displayed on your screen as "thumbnail" images, so that up to four can be displayed across one row. As you add more photos they will display in additional rows. In the example below, there are five images and none of them have text descriptions. You can remove or edit a picture by clicking on the Remove or Edit link right below it.
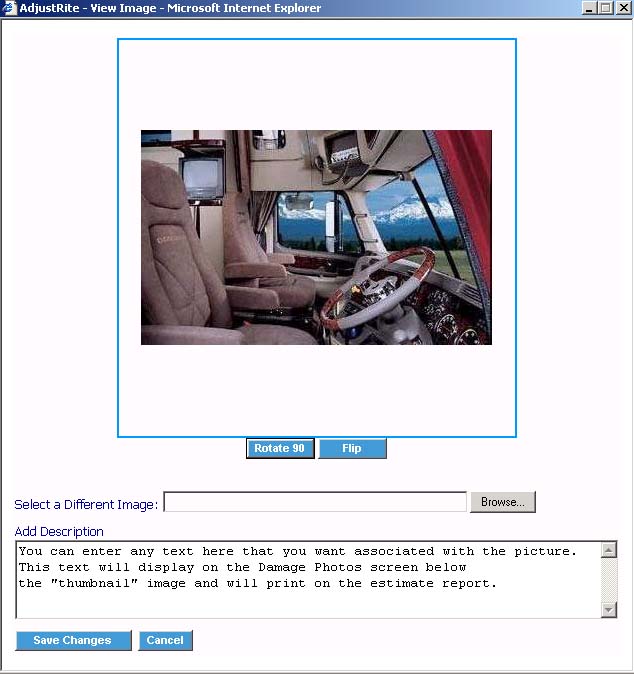
When you click on edit a popup window will appear with the full size image displayed. See the sample popup window below for available options.
You can do the following things in this popup window.
Rotate the image 90 degrees clockwise. This can be handy if you were laying on your side when you took the picture.
Flip the image into a mirror image of the original.
Select a different image - this works just like the Add Image feature above, but the new image won't display until after you save from this window.
Enter a description. You can edit the existing description, if you already entered one when you first added the photo. You can also add descriptions to photos that didn't have them yet.
Click on the Save Changes button to save any changes you have made to the photo or text, or click the Cancel button to just close the window without saving any changes.
As soon as you Save Changes, the popup window will close and the changes will be reflected on the Damage Photos screen. Note that the text description entered shows below the thumbnail image and will print on the Estimate with Photos report.