
Parts Order List |
Summary
All detail parts, needed for an estimate, show on this screen.
When you first select this screen from the Estimate menu, all the parts from the detail Estimate grid on the Estimate screen will be loaded into the Parts Order List grid. You may make changes to this part information. For example, you may want to change the prices or part descriptions for parts prior to faxing this information to a vendor.
Make sure to click on the Save button before you leave this screen if you want to save changes you made. Changes saved for this screen will not change information back on the Estimate screen. You can return to the Estimate screen by just clicking on the big red Estimate button on the time line on the bottom edge of the screen heading.
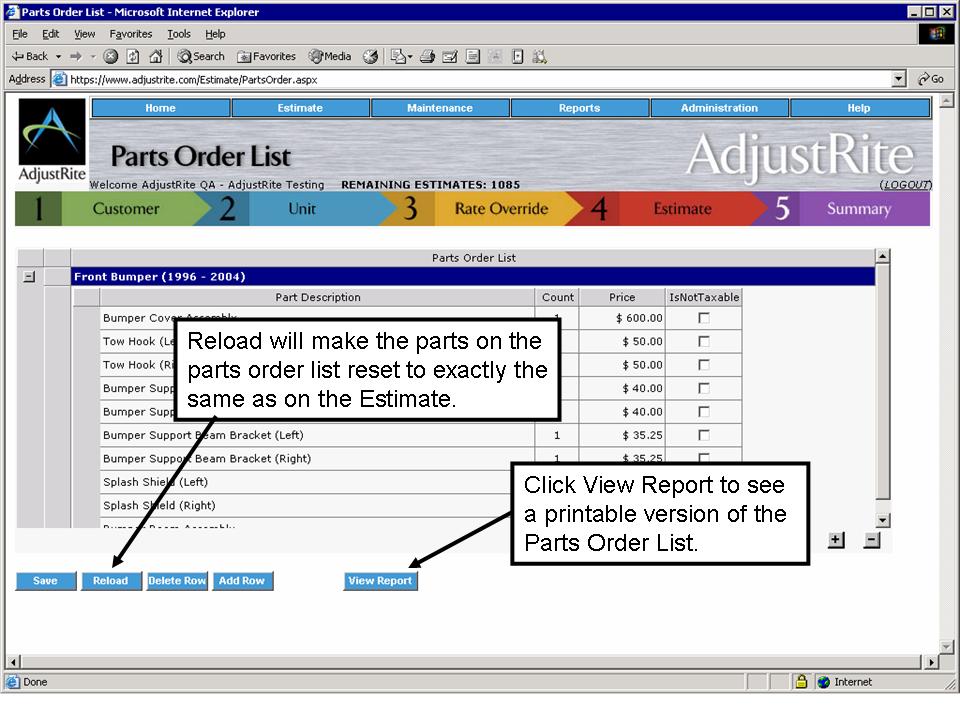
Important note. Please confirm the Parts Order list contains all the parts from your estimate before you print and fax it. If you have saved a parts order list and then more parts were added to the estimate, those parts will not show on the parts order list. Click on the Reload button to load all parts from the Estimate into the Parts Order List.
Detail Instructions
When you first see this screen you have already created your estimate. You can use this screen to fine tune your parts information prior to printing a hard copy of the Parts Order List.
The Heading of this screen works like all other screens, with the drop down menus on the top of the heading, the title across the main heading bar and the AdjustRite logo at the left. As on all other pages, clicking on the logo will take you to the Home screen. Clicking on the red Estimate button on the time line will take you back to the detail Estimate screen.
The Parts Order List grid contains a list of all parts needed for the current estimate. All parts will initially be shown "collapsed", with only the group heading for each assembly listing. Expand individual assemblies by clicking on the "+" in front of it, or click on the "+" button at the lower right of the grid to expand all groups at one time.
The information shown in this grid does not include any labor information, as it only pertains to parts you need to purchase for the estimate. Also, Repair and R&I items on the estimate will not show up in the Parts Order List grid, as those parts do not need to be ordered for the estimate.
You may change any of the information showing in the Parts Order List grid. The cells of the grid are much like the cells of a spread sheet. The following actions can be used directly inside this grid:
- Click on the "+" in front of a group to "expand" it, or if it is already expanded, click on the "-" in front of the group to "collapse" it.
- Click on a group title to select the entire group. Actions taken with the title selected effect the entire group - so if you select the group title and then click on the "Delete Row" button the entire group will be removed from the estimate grid. You may also select a group title and then retype the text in the group title. This revised text will show on the screen and on the printed version of the estimate.
- Click on any cell of a part to make it "active", so that you can type something in it. For example, if you click in the Part Description cell for a part you can type a new part description. This description will be saved for the Parts Order List, but will not change the description for the part on the Estimate screen.
- Double click on any cell of a part to enter "edit" mode. For text or numbers this means the contents of the cell are highlighted instead of the whole cell.
- Press the Esc key: If you have clicked on a group title or part description and accidentally started typing, the text will change. Press the Esc key before you press any other "action" keys and the text will go back the way it was before you started typing.
- Press the Tab key: This is a handy way to tell the system you are done entering something in a cell. The cells will be highlighted to the right until the end of the row is reached, at which point it will wrap to the first cell in the next row.
- Arrow Keys: You can use the up or down arrow keys to move to the cell below or the cell above the current one. You can't use the "down" arrow key quite the same way as you can on the Estimate grid of the Estimate screen - here you need to either press the Tab key or click outside of a cell to tell the system you are done entering in that cell.
There are several buttons below the Parts Order list grid. These buttons can be used to make various changes to the estimate.
- Save: Click on the Save button to save the information on this screen. If you have make changes and leave this screen without first Saving, your changes will be gone.
- Reload: This button will reset all of your parts to how they show on the Estimate grid of the Estimate screen. Any changes you have made on this screen will therefore be gone. Changes made on the Estimate screen will not be reflected on this screen unless you reload.
- Delete Row: If you have selected group title this button will delete all the parts within this group from the Estimate grid. If you have a single part selected only that part will be deleted from the Estimate grid. In either case a warning box will pop up to make sure you really want to delete the row.
- Add Row: This is much like Insert, but always adds the new row right after the last row in the currently selected group.
- View Report: Click here to create a printable version of your Parts Order List. You can then print, fax or email this report to your vendors to order parts for your estimate.
- "+" button expands all groups in the Estimate grid.
- "-" button collapses all groups in the Estimate grid.
![]()